Saturday, July 14, 2012

Cute Wallet from Sew to Speak Intro Class

The cute little store Sew to Speak is literally at the end of my street.  I have stopped in numerous times, window shopping, ooing and awing over all the cute, finished projects sitting around the room and fun bolts of fabric covering the walls.  I even asked for a book of projects for Christmas from there, but of course I haven't tried to make anything yet. 

So with baby #2 on the way, I decided it was time to put up or shut up with a sewing project, or I may not do it for a long time.  I still felt like my machine was a little bit foreign (every time I've had to thread my machine I have to pull out the manual), so I decided to take the intro to machine sewing class that they offer.  The project for the class was a little wallet with a snap closure, and even had interfacing involved, so it seemed like a lot of good elements would be covered.

Michelle taught my class and she was so great!  There were only four students in the class, which allowed her to give everyone the time that we needed individually.  She didn't seem annoyed with anyone's beginner questions, and she went over some helpful information (I now know what basting is and how to find the grain of fabric).  We threaded and rethreaded our own machines, wound a bobbin, and did some practice sewing before we even touched our project materials, which gave me more confidence when we got started on our wallets.

And seriously, look how cute it turned out!  I was impressed that I even finished something, let alone something that I will actually use and be proud to show people.  I bought the fabric, interfacing, and snap closure at the store, and got my thread at Joann's.


The only bad thing was that I didn't end up using my machine for the class.  Something is wrong with it that I'm hoping can be fixed, because it's only two years old and has been used a half dozen times or so on little projects.  Michelle messed around with some tension settings and suggest I take it back to where I bought it, also saying she hasn't seen many people have good luck with the lower end Singer machines. 

So I'm super bummed about that, but hopefully the Singer store I where I bought it will be good about taking a look at it.  I'm hopeful that it's something that can be easily fixed, and fast, because now I want to take on more projects!

Thursday, July 12, 2012

Pink Pancakes? WOW, Yeah, Pink Pancakes.

Continuing with the idea of trying to use my CSA goodies in more creative ways, I was super excited to find the recipe in Deceptively Delicious for Pink Pancakes.  In this one she uses beet puree, which is good as I'm finding it difficult to eat beets.  Well, I should say, I roasted them last time and I thought they were gross.  Maybe too much thyme.  Anyway.

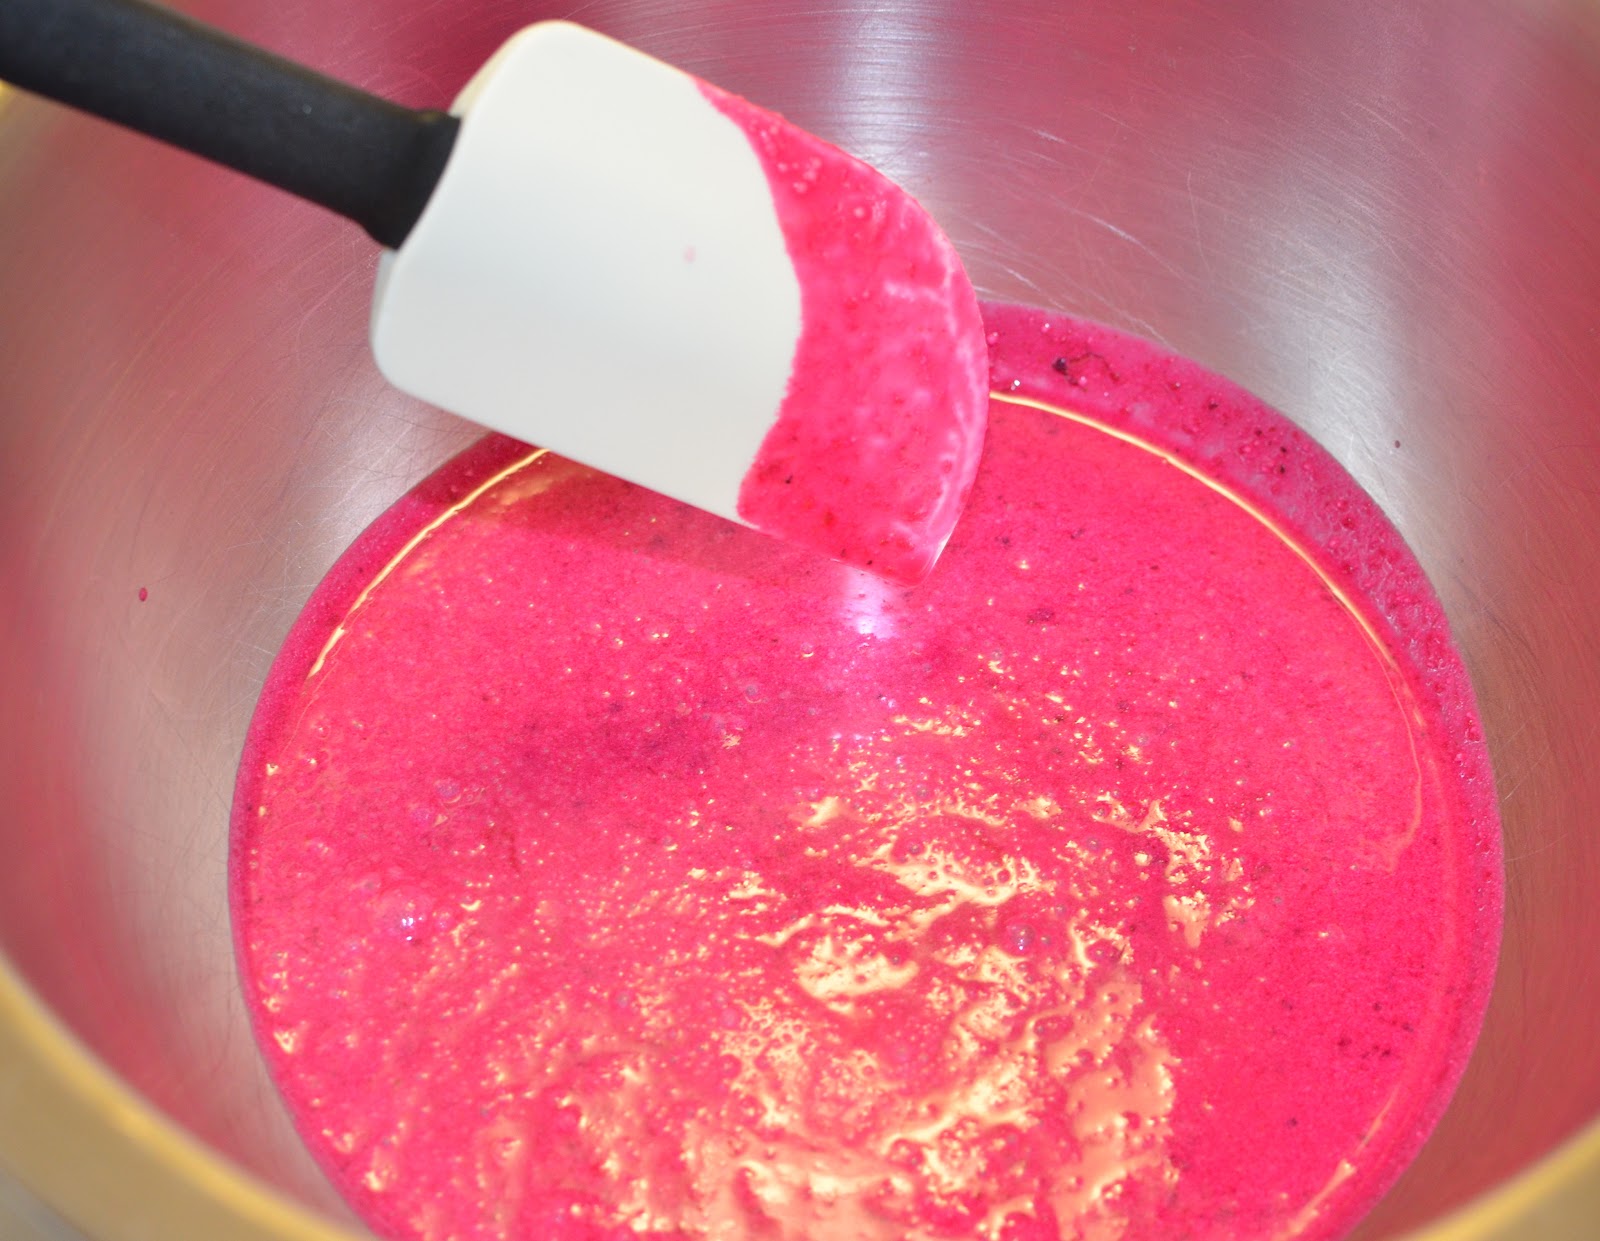
So when she says pink, holly cow does she mean pink!  Here is the batter before I added the pancake mix and the apples.  Isn't it crazy that you should eat anything that color?  And that is the part that's making it somewhat nutritious?


And of course I had to go and jack up the recipe by making it gluten free.  I used gluten fee Bisquick, and it turned out pretty well.  I did end up adding extra water because the batter was super thick.  I'm not sure if that was because of the GFness or just how the recipe was supposed to turn out.  But I've never had good luck with thick pancake batter; the insides never seem to get done.

It looked even more crazy in the black, cast iron skillet.


So the results were mixed.  The pancake batter tasted great.  The vanilla was really nice and masked the flavor of the beets, which were hardly noticeable.  But again, I have the worst time with pancakes!   I just couldn't get them done in the middle.  Maybe I need a griddle?  I used both the cast iron and a non-stick just to get them done faster, and I had the same problem with both.  If you have some advice, please let me know.


So the conclusion on this one is that next time I will use the batter with my waffle maker and I think they will totally rock.  It has a little light that turns green when the waffle is done, which apparently is more my style.

Matt really liked them and thought that the beet flavor was pretty distant, although he said every once in a while he got a bigger taste of it (I think it was mental...).  Addy ate about a half a pancake before she gave up and wanted to move on to something else, so I am calling it a success.  I gave her this little one to try at the end of the meal and she actually bit into it.  Of course right after this picture she shoved it all in her mouth and promptly spit it out.  But I'm not counting that one, I'm only counting the first half she actually ate.


Sunday, July 8, 2012

Gluten Free Pesto Pizza - Bought and Homemade Reviews

If you are gluten free, you know that pizza can be a struggle. I have tried on and off for years now to try to make a decent homemade pizza crust, and at best have only been slightly successful. The dough is usually crazy sticky and difficult to deal with, and baking it correctly so it's not burnt on the edges but done on the inside has never seemed to be my forte.

And then there is the issue of toppings.  To me, homemade pizza just never tastes as good as something that comes from a real pizza place.  Homemade ones can be good in their own right, but it's just never the same.  Although, I also always think that any salad or grilled cheese sandwich that is made for me, by someone else, always tastes better, so maybe it's that whole phenomena going on.  At any rate, I digress...

A while back, we got some pizzas from Z Pizza up the street, across from the Graceland shopping center. They offer a gluten free crust, so I was excited to try it and support the new local spot.  I have to say that the pizza was fantastic.  We got pesto, kalamata olives, and garlic as toppings, which was a very fun combo.  The crust was thinner but had a nice crunchy/chewy thing going on.  Of course it was a little pricey, but it really was spectacular, so it was worth it.  After further research, they seem to also use all organic ingredients, which helped the price tag I'm sure, but also contributed to the extreme yumminess.

So after making my own homemade pesto sauce, I decided that I needed to try making some gluten free pizza crust at home again.  I was at Marc's, and they had a Bob's Red Mill gluten free pizza crust mix in their little health food/organic isle, so I decided to try it.  In my experience Bob's usually makes decent stuff, and I decided that trying a mix versus making my own from scratch may take some of the guess work out of the equation.

I was very pleasantly surprised at how easy the crusts were to make and how good they turned out.  I honestly think it was one of the best I've made yet.  The edges were a little crispy and the center was done.  It turned out to be a little thicker style crust than the Z's Pizza, but I think I could have done a better job at smoothing/thinning it out.  The mix also makes enough to make two large pizzas, so even though the bag may seem a little expensive, it is a better buy for the money.

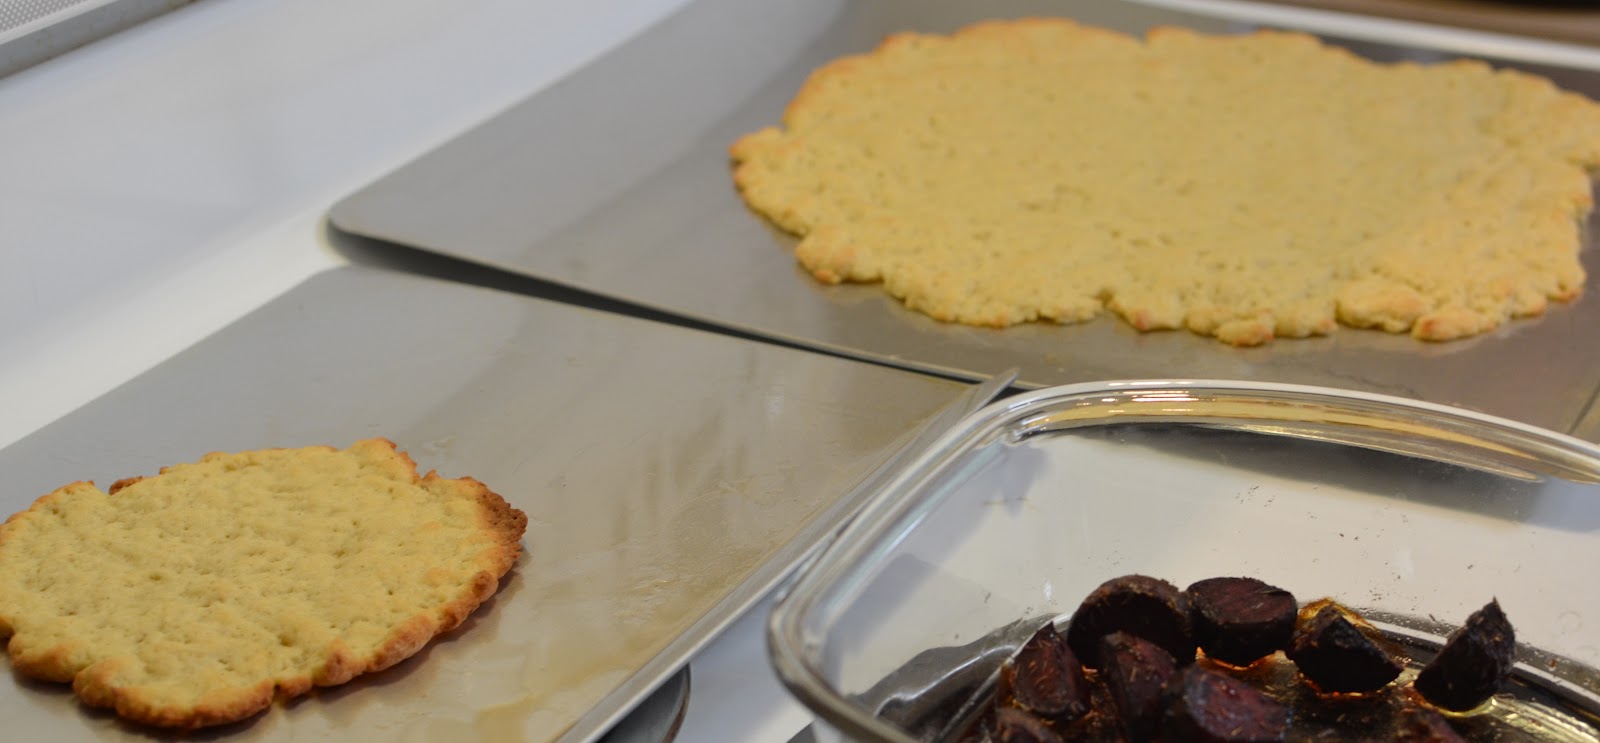
Look, crispy crusts!  The little one was for Addy.
She just got spaghetti sauce, cheese, and tomatoes.
Oh, and those other things were roasted beets.  Yuck.

The end result with my pesto, mozzarella, sun dried tomatoes, artichokes, and cut up grape tomatoes was really good!  I think next time I will use less pesto; when the pesto heated up, the oils really got flowing and there was a lot more on there than I realized.  But the flavors were great, and the crust held up well.

So my excitement for homemade pizza has been refreshed.  I'm still tempted to try making my own from scratch again, but we'll see - the fact that they sell Bob's at Marc's is pretty tempting, now that I know how easy it was and how well it turned out.

What do you think?  Makes me hungry again.

Tuesday, June 26, 2012

My New Floating Office

Since we are currently expecting Baby Dixon #2 (Yes, my existing baby is only 12 months old. Yes, we know what causes that. Yes, they will only be 17 months apart. Yes, we did that on purpose.), we are in the process of converting our old office/spare bedroom into Addy's new room. We came to this decision without much heartburn, as we really didn't use the room very much anyway. My mom now lives here in town, so we rarely have overnight guests. Matt used that closet for about 75% of his clothes, so those had to be moved into the master bedroom's closet and dressers, which was easy enough (another post to come about the closet consolidation and minimizing our clothes, which was an eye opening experience on it's own).

Then there was the "office" part of the room. We had a desk that housed stationery, cards, and paper that needed a home. It also held a lot of other random stuff that seemed to belong someplace else. There was a TV on the desk that rarely got used, so we decided to move it into our bedroom (I know, I know, tsk tsk for the TV in the bedroom thing...) and see if we would use it there.

Then I started looking around the house for other office supplies. We've had an issue finding a spot for our printer/scanner, which at this point was barely being used because of the inconvenience of digging it out of the basement. The stamps were in the kitchen junk drawer.  The computer lived in the living room, which is where I typically do bills (not at the desk in the office, mind you). When I need to work on the finances, I had to run around the house gathering up things first. Then I'd run around the house putting it all back when I was done. 

So all of this prompted what I'm calling the new, floating office in our living room. Here is what it looks like.

The first new addition was a bookshelf where we used to have an old upright piano. I loved looking at the piano, but no one ever played it. We need all of our space for productive purposes now, so the piano had to go. We gave it to someone that is going to use it for music therapy for their son, so even better. There are some personal items on the shelf, but about half of it is being used for things that used to be in our desk.

The other big investment was a wireless printer, and oh my gosh, I love it. We can print from the laptop or iPad anywhere in the house. It feels incredibly luxurious. It is a bit big, but it fits on the shelf just fine. And like I said, we need our space to work for us, not just be pretty; but being wireless, it does minimize the cords going every which way. 

Also on the shelf is my bin of files. This is part of the M.O.M. system, but also holds four zippered bags (some are pencil cases I got at the dollar store and some are plastic bags that sheets/pillow cases came in) for the following:
  1. Grocery coupons
  2. Store/restaurant coupons, gift certificates
  3. Receipts that need to be processed when I sit down to do bills
  4. Supplies, including checkbooks, a pen, scissors, and stamps
(And wow, please forgive my elementary photography with my even more crappy looking captions.  Oh how I miss having Photoshop.)

The second big piece of the floating office is the sofa table. The right drawer hides the house's inbox and directly underneath it sits a recycling bin. Most importantly, this station is right next to the front door in the living room. It is just as easy to throw mail in these two spots as it is to throw it anywhere else. The laptop usually sits somewhere on top or underneath this table as well.

The third piece are two boxes in the front coat closet. The white one holds new checkbooks, a spindle of blank CDs, and my husband's business cards. The colorful box on top are extra greeting cards for birthdays, thank yous, so sorry that your life sucks, etc.  The other things are non-office stuff.

All of these things are within about eight feet of each other in the living room, which as I mentioned, is where most of the "office" tasks happen anyway. Most of the items are portable enough that they can be carried around the house to wherever we need to work.

What do you find to be the most important part of your home office?  Would you benefit from a less traditional office space?

Thursday, June 21, 2012

Mind Organization for Moms - A New Method for Your Task List

I have always been a big list maker.  In my previous work I was a project manager, and one of my favorite parts of the job was tracking things by making calendars, action item lists, and other tools to help keep the team, tasks, and deliverables organized.  Yes, I was one of those dorks who lived by my Franklin Covey planner for a long time.  Nothing was more exciting than breaking out that new pack of task lists and calendars at the beginning of the year!

In my personal life, I am usually pretty good at keeping an updated to-do list and checking things off.  When I decided to be a stay-at-home mom, I was kind of excited about being the project manager of the house with some serious lists and organizing.  But I haven't really been happy with any system that I've come up with.  I have tried keeping electronic lists and calendars in a variety of programs including Evernote, my Yahoo email account, my Gmail email account, and other random programs on the iPad.  I've tried keeping paper lists on the fridge or in the drawer with the bills.  Nothing seemed to encompass my whole mental list, and I never seemed to have the list where I wanted it when I needed it.  I also was often overwhelmed by the length of the list, and only a few things seemed to get checked off.  I was left feeling like I wasn't getting anything done and forgetting important things.  This was so not me!

So a while back, Simplemom.net had a post (that I can't seem to find now, but here is the info on the M.O.M. site) about the Mind Organization for Moms program (M.O.M. for short).  From the site, the author April Perry describes the program as "...a mom-specific adaptation of David Allen’s best-seller Getting Things Done®.  It’s designed to help you handle all the papers, emails, tasks, and projects you have on your plate."  This tag line alone was enough to get me interested in reading it.  I was thinking that I would at least read the shorter overview paper, maybe get a few tips, and just get back into being a little more productive and organized.

After reading the overview of the program, I was intrigued enough to read the long version, an 86 page PDF.  I found that there are some things that I really love about this system:
  • It pulls together all of spots where things end up that you need to attend to.  You have your snail mail pile.  You have invitations and other things on the refrigerator.  You have receipts in your wallet.  You have messages in your email inbox (somewhere, because there are so many messages, that the only ones you see are the 20 on the first page) .  You have invitations and messages on Facebook.  I didn't even realize how much stuff collects in so many places, taking mental energy to remember.  This system brings it all together.
  • In the end, you have a list of things you have to do now, and a bunch of other lists of things you want to do later.  And you don't have to worry about the things you are going to do later, because they are on the list.  You'll look at them later.
  • You also have your lists categorized.  So if you are out doing errands, let's say, and you have time for an extra one, you can look at your errand list and make another quick stop.  Boo-yah.  
Things I don't like about the system, or things that haven't seemed to really apply to me yet:
  • She suggests using a cubby system for additional paperwork and project materials.  I'm not a huge paper person, and I don't really have an office space to house a lot of stuff like that, so right now I'm not doing that piece.
  • I haven't used the idea of a goal review, which is something I probably should do, but haven't taken the time.
The main reason this whole system works well is the weekly review, which anyone who tries to keep on top of their to-do lists understands.  You have to review your tasks and "inboxes" every week, or things slip through the cracks.  


The format of my "Immediate Next Actions" list, and where I keep all of the other lists.
Yes, it is a planner.  I know, old habits die hard. But it's working. Also my current calendar
option of choice, my Google calendar printed out and updated by hand in between
electronic updates.

Going through this process has resulted in a nice little system in which to work, as well as help motivate me to keep it up.  I definitely feel:
  1. Like I've been more productive,
  2. That I'm working on the things that are most important at any given moment, and
  3. When I have a free moment, I am making the most of my time.  If I choose to.  Sometimes I choose to nap.  But if I do, I know exactly what I should be doing instead.  :-)
Does anyone have any fun tips on staying organized (or staying motivated to be productive) with your personal task list?

Monday, June 18, 2012

Spinach Chicken Nuggets

I'm trying to get a little more creative in coming up with food for my little miss to eat. She has been eating sooooo much more since we ditched the formula, it is crazy.  It is hard to come up with a variety of things that 1) she can feed herself, since she won't really let us feed her anymore, 2) don't require her to use a spoon, because that just isn't working yet, and 3) she can chew with five teeth.

I borrowed Jessica Seinfeld's Deceptively Delicious cookbook from the library hoping to find some inspiration.  Her basic concept is to puree veggies and sneak them into foods that your kids already eat; she usually lists multiple vegetables that can be used in each recipe as well. 

Since Addy seemed to like the chicken nuggets we had at her birthday party, I decided to try making a healthier version from the book. I had a giant container of spinach in the fridge that was on it's last leg, so I decided to use it for the puree this time. Matt also had a loaf of lite wheat bread that wasn't going to make it much longer, so I decided to use that to make the bread crumbs. I know a more nutritious bread would have made them even better, but I'm all about not wasting food.

So I tore the bread up in batches and toasted it in the oven at 300 degrees. 


When it was nice and dry, I threw it into the food processor. Voila, bread crumbs.

Meanwhile I took the spinach in batches and steamed it for a few seconds in a pan of water, and threw that into the food processor.


For the nuggets, you dip the chicken in the egg/spinach mixture, and then into the breadcrumb mixture (see the recipe for all the other stuff that goes in there). The spinach definitely made for a thicker coating, but it worked. Jessica's recipe said to then fry them in a pan, but I decided to just bake them in the oven to make them a little healthier.

The result turned out better than I was expecting. They crisped up fairly well and held together, which was what I was worried about.  As leftovers they definitely need to be heated up in the toaster oven; the microwave left them super soggy and gross. I stuck the rest of them in the freezer, and I think they will probably defrost fine as long as we stick with the toaster oven.


As far as a grade from Addy, based on how she ate them I would say she gave them a B+.  The only time she totally rejected them was when I used the microwave to heat them up, and I really do not blame her.  She generally eats at least two or three of them every time we've tried them. 

So overall, I think these nuggets are a good way to get some protein and extra veggies in her at the same time.  Jessica's book has also inspired me to use up those extra baby food purees we have in the freezer.  We'll see if I can get creative.

Friday, June 15, 2012

CSA Inspired Food

The CSA is definitely helping me come up with some new ideas for things to make for dinner. The last couple weeks, I've been waiting until Tuesday to see what we get in our veggie pile before looking up recipes and deciding what to make for the week. Of course, then we all got sick and not only did nothing sound good but not much managed to get "cooked." So I'm trying to get back on course with making some good food this week.

Last week the CSA bounty was as follows:
  • Basil
  • Lettuce, both red and green
  • Beets, greens attached
  • Carrots, greens attached
  • Green onions
  • Garlic scapes - I've never seen these before, but the CSA folks said that they are the things that grow out of the ground from the garlic. They cut them off so that the plant will focus on growing the bulb itself, but you can eat and cook with the scapes like you can the bulb. Pretty cool.
And this is what I decided to do with some of it:
  • Pesto using the CSA basil, garlic scapes, and  some basil from our garden. The pesto would be for pasta one night and on a pizza one night.  Both would be served with salads to use up some of that lettuce.
  • Carrot top and quinoa soup
  • Asian chicken lettuce wraps, using the CSA lettuce, garlic scapes, green onions, and beet greens.
  • Roasted beets for salads
In and out of us all being sick, I managed to only make the pesto last week and have it on some pasta, but I am working on the the rest of it this week/weekend. Luckily all of the produce seems to be still hanging in there.

Pesto

I hate this but I took no pictures of the pesto in progress or even the finished dish, but it turned out pretty well. I started with this recipe from Ina Garten, but of course I had to alter it a bit to use some of the things I already had to save a couple bucks. I used the garlic scapes instead of the garlic, which I think actually are a bit milder than the garlic bulbs, but they still provided really good flavor. I also used (I know, this part is weird) pecans instead of walnuts, because I had them already. I just knew I wouldn't use the rest of that bag of walnuts, so I just decided to try it.

Next time, I will add the oil a batch at a time, tasting in between, because I think mine is a bit too oil laden. I know, that's what pesto is, but I think the basil to oil ratio isn't as good as the stuff I have bought in the store.

As for the pasta dish, I kept it very simple. I chopped up a can of artichokes and a half jar of sun dried tomatoes packed in oil (dang, those things are pricey - anyone know of a good place to get these on the cheap?), threw those in a pan with the cooked pasta and a few spoons of pesto.  And maybe it was that I was in the mood for some comfort food, but wow, it was so good.

Here is a picture of it after it's been in my fridge for a week, before the rest of it heads to the freezer:

So hopefully I will have some more fun stuff to show you soon.  Assuming we all stay healthy.